
Open-plan living dining rooms have become the backbone of modern home layouts, replacing compartmentalized floor plans with flexible, multi-use spaces. Whether you’re working with a new construction footprint or knocking down a wall in a renovation, combining these two high-traffic zones demands thoughtful planning. The challenge isn’t just aesthetic, it’s about creating distinct functional areas that coexist without visual clutter or traffic jams. This guide walks through proven layout strategies, zoning techniques, and furniture choices that make combined living dining rooms work harder without feeling cramped or chaotic.
Table of Contents
ToggleKey Takeaways
- Living dining room ideas thrive on zone definition through rugs, flooring transitions, and floating furniture rather than physical walls, maintaining visual flow while separating functions.
- Proper traffic lane width (36–48 inches minimum) and furniture clearance spacing prevent cramped layouts and ensure comfortable circulation in combined spaces.
- Layered lighting with dimmers, a statement fixture over the dining table, and ambient sources at multiple heights unify both zones and control mood throughout the day.
- Multi-functional pieces like extendable tables, storage ottomans, and console tables maximize utility in open plans without adding visual clutter.
- Cohesive color palettes, matching decor elements (planters, frames, textiles), and strategic artwork placement tie living and dining areas together as one intentional design.
Why Combined Living Dining Rooms Are Perfect for Modern Homes
Eliminating the wall between living and dining spaces isn’t just a design trend, it’s a practical response to how people actually use their homes. Families gather in kitchens while cooking, kids do assignments at dining tables within earshot of the living room, and entertaining flows more naturally when hosts aren’t isolated in separate rooms.
From a structural standpoint, removing non-load-bearing walls (always verify with a structural engineer or contractor before demo) opens sightlines and allows natural light to penetrate deeper into the home. In homes built before the 1980s, dining rooms were often formal, used only for holidays. Modern lifestyles favor flexible spaces that adapt throughout the day.
Real estate value plays a role too. Open-plan layouts photograph well, appeal to buyers prioritizing community spaces over formal rooms, and make smaller square footage feel larger. A 900-square-foot home with an open living dining area can feel more spacious than a 1,100-square-foot home chopped into small rooms.
The trade-off? Noise travels freely, clutter is always visible, and defining separate functions without physical barriers requires deliberate design choices. That’s where the following strategies come in.
Define Zones Without Walls: Smart Space Division Techniques
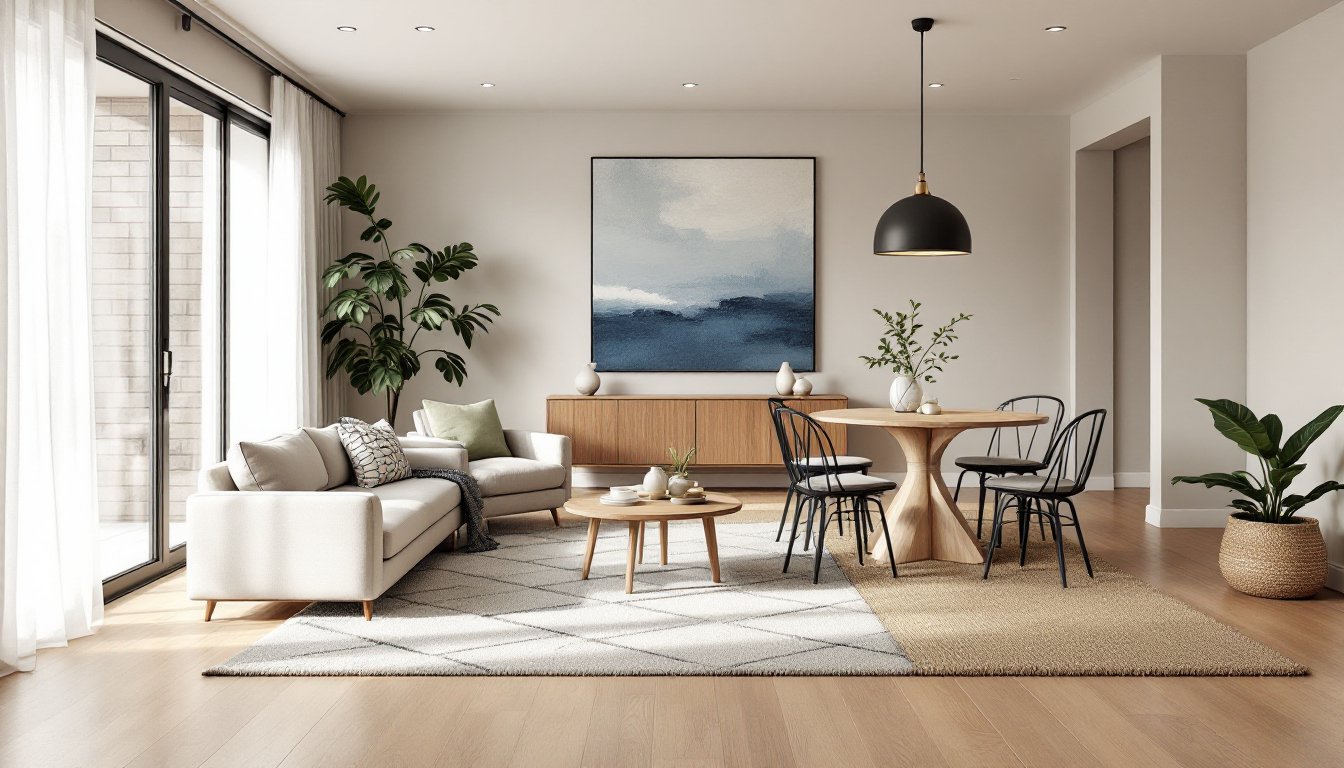
Creating visual boundaries without drywall starts with area rugs. A 5×8-foot or 8×10-foot rug anchors the dining table and chairs, while a separate rug (often larger, like 9×12 feet) grounds the living room seating. Choose rugs with at least 24 inches extending beyond furniture edges so chairs don’t catch when pulled out.
Flooring transitions work when the layout allows. Hardwood in the living area transitioning to tile or luxury vinyl plank (LVP) in the dining zone creates a subtle shift. If you’re installing new flooring, run planks perpendicular to each other in each zone, this requires a transition strip but signals separate functions. Note: transitions must meet IRC requirements for height differences (typically no more than 1/4 inch without beveling).
Partial dividers like open shelving units, console tables, or half-walls (pony walls) at 36-42 inches tall maintain sightlines while providing separation. A floor-to-ceiling bookcase left open on both sides offers storage and division without blocking light. If building a pony wall, you’ll need to locate studs and possibly sister joists for support, not a cosmetic-only project.
Ceiling treatments define zones overhead. Painting the dining area ceiling a shade darker, adding a tray ceiling detail, or installing a statement light fixture (chandelier over the table, recessed lights in the living area) guides the eye to recognize distinct spaces. Many of these modern design strategies involve layering multiple subtle cues rather than relying on a single dramatic element.
Furniture Arrangement Strategies for Seamless Flow
Start with traffic lanes. Main walkways between zones should measure at least 36 inches wide: 42-48 inches is more comfortable. Measure from furniture edges, not walls. If your sofa backs up to the dining area, leave enough clearance behind it (minimum 30 inches) so diners can push chairs back without hitting cushions.
Floating furniture is your best layout tool. Pull the sofa away from walls to face the dining table at an angle or perpendicular. This creates an implied boundary and allows circulation behind seating. Pair the sofa with a console table along its back edge, this adds surface space for lamps or decor while marking the transition between zones.
Scale matters more in combined spaces. An oversized sectional can devour visual space and crowd the dining area. Opt for a standard three-seat sofa (around 84 inches wide) or a smaller sectional with a chaise. Similarly, choose a dining table sized for your actual needs: a 36×60-inch table seats six comfortably without overwhelming a small open plan.
Orientation of the dining table depends on room shape. In narrow rectangular spaces, position the table lengthwise parallel to the longest wall. In square or L-shaped layouts, center the table to anchor the zone. Make sure there’s 36-48 inches of clearance on all sides for chair movement and serving.
Consider sightlines from seating. If the sofa faces a TV, ensure the dining table doesn’t block the screen. Conversely, diners shouldn’t stare directly at a television during meals unless that’s intentional. Angling furniture slightly breaks up rigid gridlines and feels more inviting, a technique often highlighted in contemporary interior layouts.
Color and Lighting Tips to Unify Your Living Dining Area
Paint color sets the baseline for cohesion. A single neutral on all walls (greige, warm white, soft gray) allows furniture and decor to define zones. If you want color variation, use one shade in the living area and a complementary tone two shades lighter or darker in the dining zone, test samples in both areas under natural and artificial light.
Accent walls can anchor the dining area without fragmenting the space. A darker paint color, board-and-batten paneling, or removable wallpaper behind the dining table creates a focal point. Keep the remaining three walls consistent with the living area to maintain flow.
Lighting layers are critical. Overhead ambient lighting (recessed cans spaced 4-6 feet apart) provides general illumination. A statement chandelier or pendant over the dining table should hang 30-36 inches above the tabletop: for an 8-foot ceiling, that’s roughly 66-72 inches from the floor to the bottom of the fixture. Use a dimmer switch (standard residential dimmers handle 600W incandescent or compatible LED loads) to adjust mood.
In the living area, combine floor lamps, table lamps, and wall sconces at different heights to avoid a flat, single-source look. Aim for lighting sources in at least three corners of the room. LED bulbs in 2700K-3000K (warm white) create a cohesive temperature across both zones: mismatched color temps (cool white in one area, warm in another) feel disjointed.
Natural light should flow unobstructed. Use sheer curtains or top-down/bottom-up blinds on windows to control privacy without blocking daylight. If the dining table sits near a window, avoid heavy drapes that create a visual barrier between zones.
Multi-Functional Furniture Ideas for Dual-Purpose Spaces
Extendable dining tables adapt to daily use and entertaining. A 42×60-inch table with a drop-in leaf expands to 42×78 inches, seating eight instead of six. Look for self-storing leaves that slide under the tabletop, no hunting in the basement when guests arrive. Solid wood or engineered wood tables handle the mechanical stress of extensions better than veneers.
Storage ottomans serve as coffee tables, extra seating during parties, and hidden storage for throws, remotes, or kids’ toys. Choose ottomans with removable lids rather than flip-top hinges for easier access. Standard heights range from 16-18 inches to align with sofa seat cushions.
Console tables behind sofas double as dining buffets, bar setups during gatherings, or workspaces. A 30-inch-tall console with a slim depth (12-15 inches) won’t intrude into walkways but provides surface area. Some models include outlets or USB ports, plan placement near existing wall outlets to avoid running extension cords across traffic paths.
Bench seating on one side of the dining table saves space and slides under the table when not in use. A 48-inch bench can seat three in a pinch, compared to two separate chairs. Add cushions for comfort: upholstered benches with storage underneath (lift-top seats) maximize utility.
Nesting side tables expand when needed and tuck away to free floor space. Use the largest as a primary end table beside the sofa: pull out the smaller tiers for drinks during movie night. This approach, commonly seen in modern modular interiors, prevents the room from feeling over-furnished during everyday use.
Decor and Styling Tricks to Personalize Your Combined Space
Artwork scale should match the zone. A large horizontal canvas (48×36 inches or bigger) works above a sofa: a vertical piece or gallery wall suits the dining area. Hang art so the center sits at 57-60 inches from the floor (gallery standard). In an open plan, repeat one color or theme across both areas, say, black frames in the living room and black chair legs in the dining zone.
Greenery softens hard edges and ties spaces together. A tall fiddle leaf fig or snake plant in a corner between zones acts as a living divider. Use matching planters in both areas (ceramic, woven baskets, matte black) to create visual rhythm.
Textiles add warmth and dampen sound in open plans. Layer throw pillows on the sofa in colors that echo the dining chairs’ upholstery. Add a table runner or placemats that pick up the rug’s palette. Curtains, even purely decorative floor-length panels, frame windows and add softness.
Mirrors expand perceived space and bounce light. Hang a large mirror opposite a window in the dining area to reflect natural light into the living zone. Avoid placing mirrors where they reflect clutter or create awkward sightlines (like directly facing the toilet if a bathroom is visible).
Curated collections unify the space without matchy-matchy stiffness. Display a set of ceramic vases in varying heights on the console table, then repeat one on the dining table. Group coffee table books in the living area with a stack on the dining buffet. Repetition with variation keeps the eye moving comfortably between zones.
Conclusion
Combining living and dining areas into one functional space isn’t about erasing boundaries, it’s about defining them intentionally through furniture placement, lighting, and thoughtful details. The strategies above prioritize flow, flexibility, and real-world use over magazine-perfect staging. Measure twice, test furniture arrangements with painter’s tape on the floor, and remember that even small tweaks, swapping a bulky armchair for a sleek accent chair, adding a dimmer, can shift how the entire room functions.